CI as a Serviceに触れてみよう第一弾として今回はwerckerを触ってみます。
巷ではTravisCIやCircleCIが有名ですが、privateでフリーなgitリポジトリを利用したかったので
bitbucketが利用できるwerckerを選択!
werckerを使うと…
リモートリポジトリにソースをpush
→リモートリポジトリがwerckerに対してWebフック
→werckerが対象のgitリポジトリからソースをダウンロード
→werckerがgitリポジトリ内にある設定ファイル(wercker.ymlなど)からCI用のVMを作成し
必要なモジュールインストール及びビルド、テストを自動実行
→必要に応じて自動デプロイを実施
というフローでCIしてくれます。
今回はbitbucketに対してソースをpushすると自動的にwerckerでテストを走らせて
通ったらOpenShiftに自動デプロイをする、というのをやってみます。
1. Webアプリを準備
今回は(も?)Python/Flaskでやってみます。ソースをtreeした結果はこんな感じ
├── requirements.txt
├── wercker.yml
└── wsgi
    ├── __init__.py
    ├── application
    ├── ciapp.py
    ├── templates
    │   ├── _index.html
    │   └── _login.html
    └── test_ciapp.py
対象のFlaskアプリのciapp.py↓
# -*- coding: utf-8 -*-
from flask import Flask, request, render_template

app = Flask(__name__)

@app.route("/")
def index():
    return render_template("_index.html")

@app.route("/login", methods=["GET", "POST"])
def login():
    if request.method == "GET":
        return render_template("_login.html")
    elif request.method == "POST":
        if request.form["username"] == "hoge" and request.form["password"] == "fuga":
            return "you are authorized"

    return "bad request"

if __name__ == '__main__':
    app.debug = True
    app.run()
と、そのテストコードのtest_ciapp.py↓
# -*- coding: utf-8 -*-
import sys
from os import path
sys.path.append(path.dirname(path.abspath(__file__)))

from nose.tools import with_setup, raises, eq_, ok_
import ciapp

ciapp.app.testing = True
client = ciapp.app.test_client()

def test_get_index():
    res = client.get('/')
    eq_(200, res.status_code)

def test_get_login():
    res = client.get('/login')
    eq_(200, res.status_code)

def test_post_login():
    res = client.post('/login',data={
        'username':'hoge',
        'password':'fuga'
    })
    eq_(200, res.status_code)
    eq_('you are authorized', res.data.decode())
...
applicationファイルはOpenShiftでFlask動かすためのwsgiの設定ファイルで以下のように記述
#!/usr/bin/python
import os
import sys

sys.path.insert(0, os.path.dirname(__file__) or '.')

PY_DIR = os.path.join(os.environ['OPENSHIFT_HOMEDIR'], "python")

virtenv = PY_DIR + '/virtenv/'

PY_CACHE = os.path.join(virtenv, 'lib', os.environ['OPENSHIFT_PYTHON_VERSION'], 'site-packages')

os.environ['PYTHON_EGG_CACHE'] = os.path.join(PY_CACHE)
virtualenv = os.path.join(virtenv, 'bin/activate_this.py')

try:
    exec(open(virtualenv).read(), dict(__file__=virtualenv))
except IOError:
    pass

from ciapp import app as application
OpenShiftでFlask動かすためのサンプルはこちらを参照→openshift/flask-example
requirements.txtはpip installでライブラリとかインストールするためのファイルで
依存関係のあるライブラリを以下のようにして書き出せばOK。
pip freeze > requirements.txt
2. bitbucketにリポジトリを作成
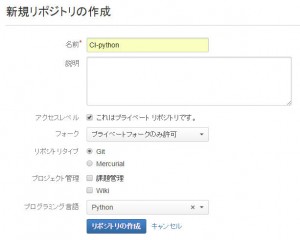
bitbucketに適当なリポジトリを作成します。3. Werckerでアプリケーションの設定
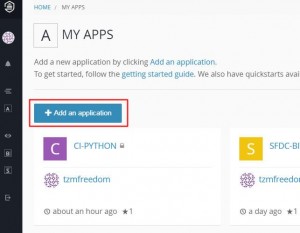
werckerにログインして、アプリケーションを作成します。今回はbitbucketを選択
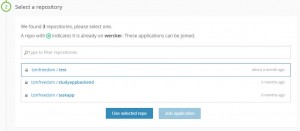
対象のリポジトリを選択
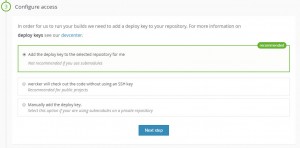
Configure Accessはgitリポジトリからcloneする権限をwerckerに付与する設定です。
詳細はこちらから。
ここではbitbucketのリポジトリのデプロイキーをwerckerに付与しています。
bitbucketのリポジトリの設定でwerckerが追加されていることを確認できます。
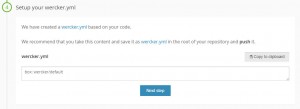
次にwerckerがリポジトリのソースを見て「こんなwercker.ymlどう?」ってリコメンドしてくれます。
イチから作る場合は、ここは飛ばしてもOK。
wercker.ymlはCIの環境設定を行うファイルになります。
ざっくり言うと、どのプラットフォームでどういったビルド・テストスクリプトを動かして
どういう風にデプロイするか、というのを設定できます。
werckerでCIを行う場合は、このファイルをgitリポジトリ内に入れる必要があります。
今回のアプリの場合のwercker.ymlはこんな感じになります。
box: wercker/python
# Build definition
build:
  # The steps that will be executed on build
  steps:
    # Use this virtualenv step for python 3.3
    - virtualenv:
        name: setup virtual environment
        python_location: /usr/bin/python3.3

    # A step that executes `pip install` command
    - pip-install


    # A custom script step, name value is used in the UI
    # and the code value contains the command that get executed
    - script:
        name: execute test
        code: |
          nosetests wsgi/test_ciapp.py
boxはOSや必要なソフトウェアがインストールされた環境でdockerのコンテナ的な感じ。
今回はpython使うのでwercker/pythonを利用。
buildはwerckerでビルドを実行した時の処理内容を記述します。
stepというのはビルドやデプロイの一つ一つの操作・工程を示しています。
virtualenvやpip installなどpythonお馴染みのコマンドはwercker側で提供されてます。
scriptではシェルスクリプトを自由に書ける部分になり、今回はnoseを使って自動テストを行っています。
上記例だとvirtualenvでpythonの仮想環境構築
→仮想環境上でpip installで必要なライブラリをインストール
→テスト実行
という流れになります。
werckerにアプリを作成した時点でbitbucketのリポジトリには前述のデプロイキーと
フックの設定が追加されているので、werckerでの自動ビルドまでが出来るようになっています。
4. OpenShiftへのデプロイ設定
ビルドまでうまくいくのを確認したら今度はOpenShiftへの自動デプロイの設定を行います。
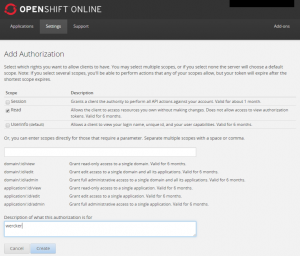
OpenShift側でテキトーなアプリ(ギア)を作ってAuthorization Tokenを発行します。
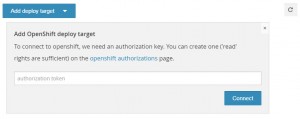
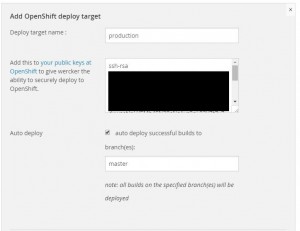
werckerのアプリのSettingsでAdd deploy targetからOpenShiftを選択すると
以下のようにAuthorization Tokenを要求されます。
そこで、上記で発行したAuthorization TokenをコピペしてConnectすると
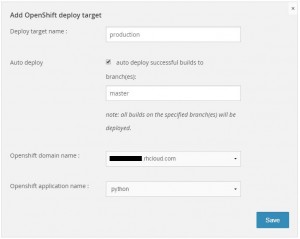
OpenShiftや対象のブランチ、自動デプロイの有無の設定画面が表示されます。
Saveをすると、werckerの公開鍵が表示されるのでコレをOpenShiftの公開鍵として登録します。
あとはSaveを押して設定を保存します。
これでビルドが成功したらwerckerが持ってる秘密鍵を使って
自動的にOpenShiftにデプロイする設定が完了しました!
実際の動作
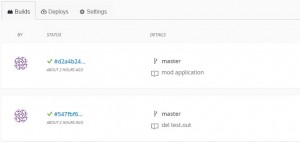
bitbucketのリモートリポジトリに対してpushするとフック設定によりwerckerが動きます。werckerが動くと対象アプリのビルド一覧が更新されます。
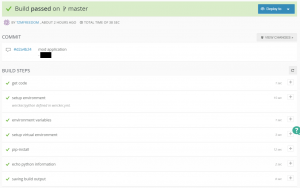
ビルドの詳細はこんな感じ
ビルドのステップで一つでもミスるとビルド失敗になります。
コマンドの戻り値が0以外で返って来たらミスという判定になっているっぽいです。
コマンドのログも画面上でちゃんと見れます。
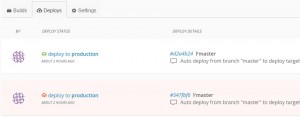
自動デプロイの設定をした場合はビルド成功後に自動的にデプロイタスクが実行されます。
今回はOpenShiftにデプロイしましたが、デプロイでもビルドと同じようにスクリプトを書けるので
Capistrano、fabric、dockerやら何でもいけちゃいます。herokuも対応してます。
