OAuth2.0 Providerを実装したく、OSSを色々と巡ってみて
bshaffer/oauth2-server-phpが使いやすそうだったので触ってみましたー。
今回はAuthorization Code Grantのフローを実装してみました。
構成は以下のとおり。
- Platform: heroku
- Database: postgres(Heroku Postgres)
- Language: php(5.6.11)
- Web server: Apache(2.4.10)
インストール
composer.jsonにbshaffer/oauth2-server-phpを追加{
"require": {
"bshaffer/oauth2-server-php": "~1.7"
}
}
で、インストール。
$ composer install
DBのセットアップ
Postgresで以下のSQLを実行します。CREATE TABLE oauth_clients (client_id VARCHAR(80) NOT NULL, client_secret VARCHAR(80) NOT NULL, redirect_uri VARCHAR(2000) NOT NULL, grant_types VARCHAR(80), scope VARCHAR(100), user_id VARCHAR(80), CONSTRAINT clients_client_id_pk PRIMARY KEY (client_id));
CREATE TABLE oauth_access_tokens (access_token VARCHAR(40) NOT NULL, client_id VARCHAR(80) NOT NULL, user_id VARCHAR(255), expires TIMESTAMP NOT NULL, scope VARCHAR(2000), CONSTRAINT access_token_pk PRIMARY KEY (access_token));
CREATE TABLE oauth_authorization_codes (authorization_code VARCHAR(40) NOT NULL, client_id VARCHAR(80) NOT NULL, user_id VARCHAR(255), redirect_uri VARCHAR(2000), expires TIMESTAMP NOT NULL, scope VARCHAR(2000), CONSTRAINT auth_code_pk PRIMARY KEY (authorization_code));
CREATE TABLE oauth_refresh_tokens (refresh_token VARCHAR(40) NOT NULL, client_id VARCHAR(80) NOT NULL, user_id VARCHAR(255), expires TIMESTAMP NOT NULL, scope VARCHAR(2000), CONSTRAINT refresh_token_pk PRIMARY KEY (refresh_token));
CREATE TABLE oauth_users (username VARCHAR(255) NOT NULL, password VARCHAR(2000), first_name VARCHAR(255), last_name VARCHAR(255), CONSTRAINT username_pk PRIMARY KEY (username));
CREATE TABLE oauth_scopes (scope TEXT, is_default BOOLEAN);
CREATE TABLE oauth_jwt (client_id VARCHAR(80) NOT NULL, subject VARCHAR(80), public_key VARCHAR(2000), CONSTRAINT jwt_client_id_pk PRIMARY KEY (client_id));
クライアントID、シークレットは以下のようなSQLでレコードを突っ込んでおきます。
INSERT INTO oauth_clients (client_id, client_secret, redirect_uri) VALUES ('hoge', 'input your secret', 'https://hoge.example.com/');
ユーザも作成しておきます。
INSERT INTO oauth_users(username, password, first_name, last_name) VALUES ('hogehoge', '39975bb0ba31825c4fdd3de775dd468081b3522b', 'ho-ge', 'tarou');
passwordはsha1のハッシュ値を入力します。
厳密に言うとoauth_usersテーブル内に保持する必要は無いのですが、Resource Owner Password Credentials Grantを実装する場合は、参照先がoauth_usersなので、クレデンシャルのリポジトリはoauth_usersで統一しておいた方が良い気がします。
画面・処理の作成
アプリケーションルート直下にserver.phpを以下の内容で作成します。<?php
$url = parse_url(getenv('DATABASE_URL'));
$dsn = sprintf('pgsql:host=%s;dbname=%s', $url['host'], substr($url['path'], 1));
// error reporting (this is a demo, after all!)
ini_set('display_errors',1);error_reporting(E_ALL);
// Autoloading (composer is preferred, but for this example let's just do this)
require_once(__DIR__.'/vendor/bshaffer/oauth2-server-php/src/OAuth2/Autoloader.php');
OAuth2\Autoloader::register();
// $dsn is the Data Source Name for your database, for exmaple "mysql:dbname=my_oauth2_db;host=localhost"
$storage = new OAuth2\Storage\Pdo(array(
'dsn' => $dsn,
'username' => $url['user'],
'password' => $url['pass']
));
// Pass a storage object or array of storage objects to the OAuth2 server class
$server = new OAuth2\Server($storage);
// Add the "Client Credentials" grant type (it is the simplest of the grant types)
$server->addGrantType(new OAuth2\GrantType\ClientCredentials($storage));
// Add the "Authorization Code" grant type (this is where the oauth magic happens)
$server->addGrantType(new OAuth2\GrantType\AuthorizationCode($storage));
$defaultScope = 'basic';
$supportedScopes = array(
'basic',
'action1'
);
$memory = new OAuth2\Storage\Memory(array(
'default_scope' => $defaultScope,
'supported_scopes' => $supportedScopes
));
$scopeUtil = new OAuth2\Scope($memory);
$server->setScopeUtil($scopeUtil);
DB(Storageクラス)とスコープ以外は大体同じコードになると思います。
token.phpはこんな感じ
<?php

// include our OAuth2 Server object
require_once __DIR__.'/server.php';

// Handle a request for an OAuth2.0 Access Token and send the response to the client
$server->handleTokenRequest(OAuth2\Request::createFromGlobals())->send();
authorze.phpはこんな感じ
<?php
session_start();
// include our OAuth2 Server object
require_once __DIR__.'/server.php';
$request = OAuth2\Request::createFromGlobals();
$response = new OAuth2\Response();
// validate the authorize request
if (!$server->validateAuthorizeRequest($request, $response)) {
$response->send();
die;
}
// if not logged in, redirect to login page
if (null == $_SESSION["userid"]) {
header("Location: index.php?redirect=".urlencode($_SERVER["REQUEST_URI"]));
exit;
}
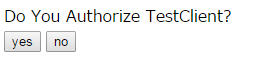
// display an authorization form
if (empty($_POST)) {
exit('
<form method="post">
<label>Do You Authorize TestClient?</label><br />
<input type="submit" name="authorized" value="yes">
<input type="submit" name="authorized" value="no">
</form>');
}
// print the authorization code if the user has authorized your client
$is_authorized = ($_POST['authorized'] === 'yes');
$server->handleAuthorizeRequest($request, $response, $is_authorized, $_SESSION["userid"]);
$response->send();
「○○へのアクセスを許可します」的な認可のスコープに応じたメッセージを出したい場合は $server->getScopeUtil()->getScopeFromRequest($request) でスコープのリストを取得して、メッセージを表示するようにします。
APIはこんな感じで作ります(今回はapi.phpで作成)
<?php

// include our OAuth2 Server object
require_once __DIR__.'/server.php';

// Handle a request to a resource and authenticate the access token
$response = new OAuth2\Response();
$scopeRequired = "basic";
if (!$server->verifyResourceRequest(OAuth2\Request::createFromGlobals(), $response, $scopeRequired)) {
    $response->send();
    die;
}

// if verification is successful, execute your action.
header("Content-type: application/json; charset=utf-8");
$token = $server->getAccessTokenData(OAuth2\Request::createFromGlobals());
$userid = $token["user_id"];
echo json_encode(
    array(
        "message" => "test!!",
        "userid" => $userid
    )
);
スコープに応じたアクセス許可をする場合は、$server->verifyResourceRequestの$scopeRequiredパラメータに必須のスコープをセットします。
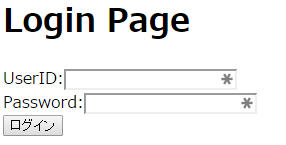
最後にindex.phpにログインフォーム/処理を作ります。
<?php

session_start();
// include our OAuth2 Server object
require_once __DIR__.'/server.php';

if (!empty($_POST["userid"]) && !empty($_POST["password"])) {
    if ($storage->checkUserCredentials($_POST["userid"], $_POST["password"])) {
        $_SESSION["userid"] = $_POST["userid"];
        header("Location: " . $_POST["redirect"]);
    } else {
    	echo "Login is failure.";
    }
}

?>
<html>
  <head></head>
  <body>
    <p1>Login Page</p1>
    <div><?php if (!empty($_SESSION["userid"])) { echo $_SESSION["userid"]; } ?></div>
    <form action="index.php" method="post">
      <label>UserID</label>:<input type="text" name="userid" value="" /><br/>
      <label>Password</label>:<input type="password" name="password" value="" /><br/>
      <input type="submit" value="ログイン" />
      <input type="hidden" name="redirect" value="<?php echo $_GET["redirect"]; ?>" />
    </form>
  </body>
</html>
herokuへデプロイ
Procfileは以下のとおりweb: vendor/bin/heroku-php-apache2 /
動作確認
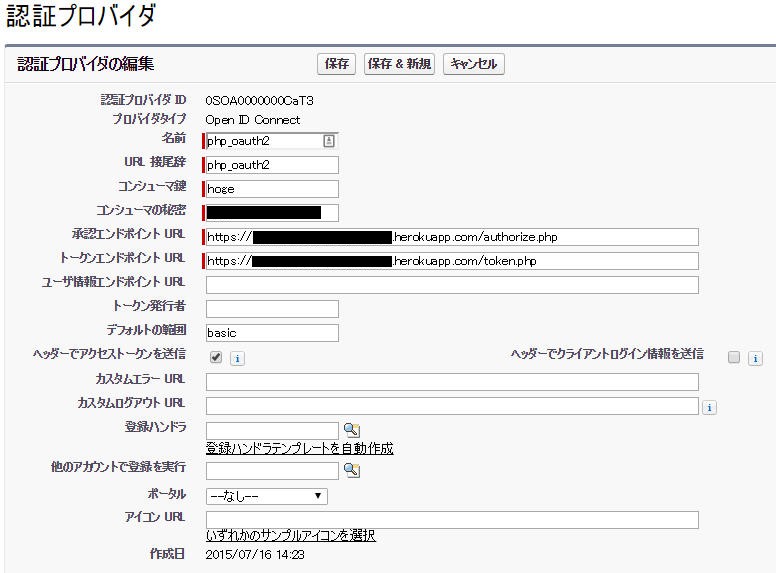
SalesforceのNamed Credentialsで動作確認をしてみます。認証プロバイダはこんな感じ
postgresのアプリケーションのリダイレクトURIを認証プロバイダのコールバックURLに変更します。
;" data-lang="pgsql">;">UPDATE oauth_clients SET redirect_uri='https://login.salesforce.com/services/authcallback/******/php_oidc' WHERE client_id='hoge';
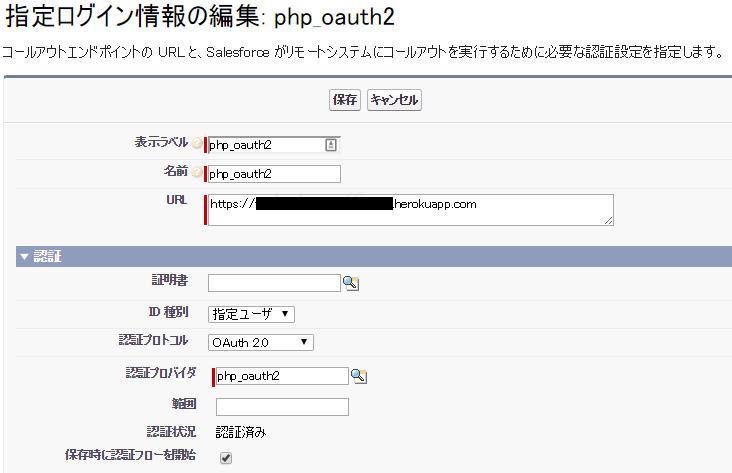
指定ログイン情報はこんな感じ
認証/認可画面はこんな感じに表示されます。
あとはApexで以下のコードを書いて実行してjsonが返ってくればOK。
HttpRequest req = new HttpRequest();
req.setMethod('POST');
req.setEndpoint('callout:php_oidc/api.php');
Http http = new Http();
HTTPResponse res = http.send(req);
System.debug(res.getBody());