ExactTargetのAPIを叩いてみたので備忘として残しておきます。REST APIとSOAP APIがありますが、今回はSOAP APIを使ってメール送信をしてみます。(現時点ではSOAP APIの方ができることが多いイメージ)
ExactTargetのSOAP APIのリファレンスは以下がオススメです。
AppCenterの設定
AppCenterのアカウントを持っていない場合は、作成する必要があります。AppCenter - Create Userからアカウントを作成します。アカウント作成後はAppCenterにログインして、アプリケーションを作成します。
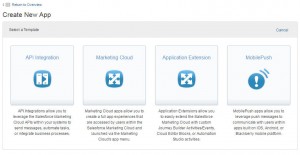
まずAPI Integrationを選択します。
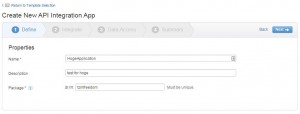
アプリケーションの基本情報をテキトーに入力します。
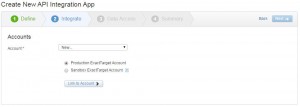
アプリケーションに紐付けるユーザアカウント(=ExactTargetの組織)を選択します。[Link to Account]ボタンをクリックするとExactTargetのログイン画面が表示されるので、ログインを行います。
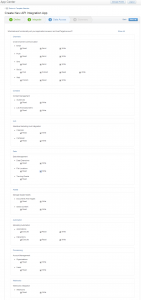
紐付けた後は、アプリケーションのアクセス権限を設定します。とりあえず全部チェックをつけておきました。
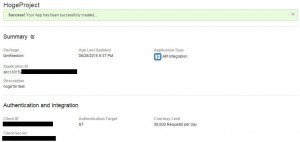
作成が完了したらClientIDとSecretをメモります。
Email Send Definitionによるメール送信
APIを使ってメールを送信するにはいくつか方法がありますが、今回はEmail Send Definitionを使って送信してみます。ユースケース的には対象のグループ(Data Extension or List)に対して、一括で送信するパターンになります。以下の手順になります。
- ExactTargetにログイン
Subscriberの更新
Data Extensionの作成
Data Extensionにデータを入れる
Data Extensionを使ってEmail Send Definitionを作成
Email Send Definitionを使ってメールを送信
Data Extensionからメールを送信した場合、Subscriber Keyに該当するSubscriberが存在しない場合は自動的にSubscriberを作成してくれます。2回目以降はSubscriber Keyに紐づくSubscriberに対してメールが送信されますが、メールアドレスの変更があっても、Subscriberに対して自動で更新処理をかけません。なので、2回目以降の送信の場合は送信前に必ずSubscriberの更新を行う必要があります。
APIを叩く前に、事前にExactTargetのWebUIでメール(テンプレート)を作成しておきます。 ExactTargetにログインしたらメインメニューのメール>Emailをクリックします。
次にメニューのコンテンツ>メールをクリックして、マイメールの[作成]>[テキストのみ]をクリックします。
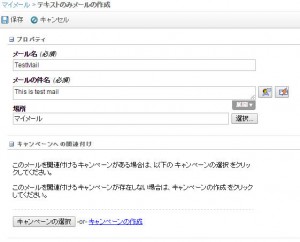
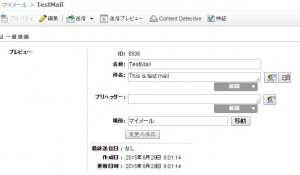
メール名、メールの件名等をテキトーに入力します。
Transactional Emailの場合は、以下の項目をメールに含む必要があります。
- %%Member_Addr%%
- %%Member_Busname%%
- %%Member_City%%
- %%Member_PostalCode%%
- %%Member_State%%
Commercialの場合は上記項目に加えて、プロファイルセンターのURLが必要です。
- %%profile_center_url%%
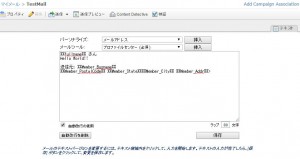
今回はTransactional Emailを利用するので以下のように作成します。
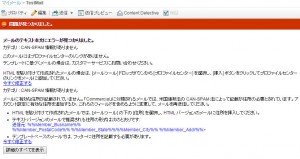
ちなみに、必須項目が入っていない状態で[検証]をすると、以下のように怒られます。
作成後はプロパティからIDを確認します。Email Send Definitionを作成するときに使います。
あとはAPIを実際に叩いていきます。 認証のリクエストは以下のとおりです。最初の認証だけはRESTです。
curl -i -X POST \
   -H "Content-Type:application/json" \
   -d \
'{
    "clientId": "{client_id}",
    "clientSecret": "{client_secret}"
}' \
 'https://auth.exacttargetapis.com/v1/requestToken'
成功時のレスポンスはこんな感じ
{
  "accessToken": "***************",
  "expiresIn": 3600
}
取得したトークンはSOAPヘッダのfueloauthの中に入れてください。
Subscriberの作成・更新は以下のとおり。メールアドレスだけ変更しています。また、SaveActionのUpdateAddはSubscriberKeyが存在すれば更新、存在しなければ新規作成、というアクションになります。SalesforceでいうところのUPSERTです。
curl -i -X POST \
   -H "SOAPAction:\"Create\"" \
   -H "Content-Type:text/xml" \
   -d \
'<?xml version="1.0" encoding="utf-8"?>
<s:Envelope xmlns:s="http://www.w3.org/2003/05/soap-envelope" xmlns:a="http://schemas.xmlsoap.org/ws/2004/08/addressing" xmlns:u="http://docs.oasis-open.org/wss/2004/01/oasis-200401-wss-wssecurity-utility-1.0.xsd">
  <s:Header>
    <fueloauth xmlns="http://exacttarget.com">{access_token}</fueloauth>
  </s:Header>
  <s:Body xmlns:xsi="http://www.w3.org/2001/XMLSchema-instance" xmlns:xsd="http://www.w3.org/2001/XMLSchema">
    <CreateRequest xmlns="http://exacttarget.com/wsdl/partnerAPI">
      <Options>
        <SaveOptions>
          <SaveOption>
            <PropertyName>*</PropertyName>
            <SaveAction>UpdateAdd</SaveAction>
          </SaveOption>
        </SaveOptions>
      </Options>
      <Objects xsi:type="Subscriber">
        <ObjectID xsi:nil="true">
        </ObjectID>
        <EmailAddress>fugafuga@example.com</EmailAddress>
        <SubscriberKey>fuga@example.com</SubscriberKey>
      </Objects>
    </CreateRequest>
  </s:Body>
</s:Envelope>' \
 'https://webservice.s7.exacttarget.com/Service.asmx'
Data Extensionの作成リクエストは以下のとおり。Subscriberの属性と同じ名前でフィールドを作成すると、メール送信時にSubscriberを自動で作成する際に項目値を自動でセットしてくれます。下の例だとDataExtensionにFullName項目を入れるとSubscriberの氏名項目にも値がセットされる、という感じ。
curl -i -X POST \
   -H "SOAPAction:\"Create\"" \
   -H "Content-Type:text/xml" \
   -d \
'<s:Envelope xmlns:s="http://www.w3.org/2003/05/soap-envelope" xmlns:a="http://schemas.xmlsoap.org/ws/2004/08/addressing" xmlns:u="http://docs.oasis-open.org/wss/2004/01/oasis-200401-wss-wssecurity-utility-1.0.xsd">
  <s:Header>
    <fueloauth xmlns="http://exacttarget.com">{access_token}</fueloauth>
  </s:Header>
  <s:Body xmlns:xsi="http://www.w3.org/2001/XMLSchema-instance" xmlns:xsd="http://www.w3.org/2001/XMLSchema">
    <CreateRequest xmlns="http://exacttarget.com/wsdl/partnerAPI">
      <Options>
      </Options>
      <Objects xmlns:ns1="http://exacttarget.com/wsdl/partnerAPI" xsi:type="ns1:DataExtension">
        <CustomerKey>DataExtensionFromAPI</CustomerKey>
        <Name>DataExtensionFromAPI</Name>
        <IsSendable>true</IsSendable>
        <SendableDataExtensionField>
          <CustomerKey>
          </CustomerKey>
          <Name>EmailAddress</Name>
        </SendableDataExtensionField>

        <SendableSubscriberField>
          <Name>Subscriber Key</Name>
          <Value>
          </Value>
        </SendableSubscriberField>
        <Fields>
          <Field>
            <CustomerKey>EmailAddress_Key</CustomerKey>
            <Name>EmailAddress</Name>
            <FieldType>EmailAddress</FieldType>
          </Field>
          <Field>
            <CustomerKey></CustomerKey>
            <Name>FullName</Name>
            <FieldType>Text</FieldType>
          </Field>
          <Field>
            <CustomerKey></CustomerKey>
            <MaxLength>100</MaxLength>
            <Name>TextField</Name>
            <FieldType>Text</FieldType>
          </Field>
          <Field>
            <CustomerKey></CustomerKey>
            <Scale>3</Scale>
            <IsRequired>true</IsRequired>
            <Precision>5</Precision>
            <Name>DecimalField</Name>
            <FieldType>Decimal</FieldType>
          </Field>
          <Field>
            <CustomerKey></CustomerKey>
            <DefaultValue>true</DefaultValue>
            <Name>BoolField</Name>
            <FieldType>Boolean</FieldType>
          </Field>
        </Fields>
      </Objects>
    </CreateRequest>
  </s:Body>
</s:Envelope>' \
 'https://webservice.s7.exacttarget.com/Service.asmx'
Data Extensionにデータを入れるリクエスト。以下では1レコードだけですが、Objectsの部分を複数にすれば一括で複数件作成できます。
curl -i -X POST \
   -H "SOAPAction:\"Create\"" \
   -H "Content-Type:text/xml" \
   -d \
'<soap:Envelope xmlns:soap="http://schemas.xmlsoap.org/soap/envelope/" xmlns:xsi="http://www.w3.org/2001/XMLSchema-instance" xmlns:xsd="http://www.w3.org/2001/XMLSchema" xmlns:wsa="http://schemas.xmlsoap.org/ws/2004/08/addressing" xmlns:wsse="http://docs.oasis-open.org/wss/2004/01/oasis-200401-wss-wssecurity-secext-1.0.xsd" xmlns:wsu="http://docs.oasis-open.org/wss/2004/01/oasis-200401-wss-wssecurity-utility-1.0.xsd">
  <soap:Header>
    <fueloauth xmlns="http://exacttarget.com">{access_token}</fueloauth>
  </soap:Header>
  <soap:Body>
    <CreateRequest xmlns="http://exacttarget.com/wsdl/partnerAPI">
      <Options/>
      <Objects xsi:type="DataExtensionObject">
        <PartnerKey xsi:nil="true"/>
        <ObjectID xsi:nil="true"/>
        <CustomerKey>DataExtensionFromAPI</CustomerKey>
        <Properties>
          <Property>
            <Name>EmailAddress</Name>
            <Value>fuga@example.com</Value>
          </Property>
          <Property>
            <Name>FullName</Name>
            <Value>Fuga 太郎</Value>
          </Property>
          <Property>
            <Name>TextField</Name>
            <Value>hoge-</Value>
          </Property>
          <Property>
            <Name>DecimalField</Name>
            <Value>31.245</Value>
          </Property>
          <Property>
            <Name>BoolField</Name>
            <Value>false</Value>
          </Property>
        </Properties>
      </Objects>
    </CreateRequest>
  </soap:Body>
</soap:Envelope>' \
 'https://webservice.s7.exacttarget.com/Service.asmx'
Email Send Definitionの作成
curl -i -X POST \
   -H "SOAPAction:\"Create\"" \
   -H "Content-Type:text/xml" \
   -d \
'<Envelope xmlns="http://schemas.xmlsoap.org/soap/envelope/" xmlns:xsi="http://www.w3.org/2001/XMLSchema-instance">
  <Header>
    <fueloauth xmlns="http://exacttarget.com">{access_token}</fueloauth>
  </Header>
  <Body>
    <CreateRequest xmlns="http://exacttarget.com/wsdl/partnerAPI">
      <Options/>
      <Objects xsi:type="EmailSendDefinition">
        <PartnerKey xsi:nil="true"/>
        <ObjectID xsi:nil="true"/>
        <CustomerKey>EmailSendDefinitionFromAPI</CustomerKey>
        <Name>EmailSendDefinitionFromAPI</Name>
        <SendClassification>
          <PartnerKey/>
          <CustomerKey>Default Transactional</CustomerKey>
        </SendClassification>
        <SendDefinitionList>
          <PartnerKey xsi:nil="true"/>
          <ObjectID xsi:nil="true"/>
          <CustomerKey>DataExtensionFromAPI</CustomerKey>
          <DataSourceTypeID>CustomObject</DataSourceTypeID>
        </SendDefinitionList>
        <Email>
          <ID>{Email ID}</ID>
          <ObjectID xsi:nil="true"/>
        </Email>
        <IsMultipart>true</IsMultipart>
      </Objects>
    </CreateRequest>
  </Body>
</Envelope>' \
 'https://webservice.s7.exacttarget.com/Service.asmx'
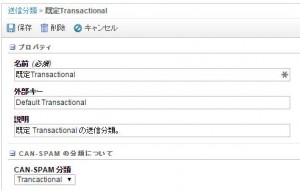
ここで利用しているSendClassificationは 管理者>送信管理>送信分類で確認できます。
今回は規定Transactionalを使うので、Default Transactionalの外部キー値を使います。
Email Send Definitionの送信リクエストは以下のようになります。
curl -i -X POST \
   -H "SOAPAction:\"Perform\"" \
   -H "Content-Type:text/xml" \
   -d \
'<soap:Envelope xmlns:soap="http://schemas.xmlsoap.org/soap/envelope/" xmlns:xsi="http://www.w3.org/2001/XMLSchema-instance" xmlns:xsd="http://www.w3.org/2001/XMLSchema"
xmlns:wsa="http://schemas.xmlsoap.org/ws/2004/08/addressing" xmlns:wsse="http://docs.oasis-open.org/wss/2004/01/oasis-200401-wss-wssecurity-secext-1.0.xsd"
xmlns:wsu="http://docs.oasis-open.org/wss/2004/01/oasis-200401-wss-wssecurity-utility-1.0.xsd">
<soap:Header>
  <fueloauth xmlns="http://exacttarget.com">{access_token}</fueloauth>
</soap:Header>
<soap:Body>
  <PerformRequestMsg xmlns="http://exacttarget.com/wsdl/partnerAPI">
    <Action>start</Action>
    <Definitions>
      <Definition xsi:type="EmailSendDefinition">
        <CustomerKey>EmailSendDefinitionFromAPI</CustomerKey>
        <SenderProfile>
          <FromName>hoge</FromName>
          <FromAddress>hoge@example.com</FromAddress>
        </SenderProfile>
      </Definition>
    </Definitions>
  </PerformRequestMsg>
</soap:Body>
</soap:Envelope>' \
 'https://webservice.s7.exacttarget.com/Service.asmx'
Transactional Emailに必須な項目がメール内に記述されていない場合は、以下のエラーメッセージが返されます。
<?xml version="1.0" encoding="utf-8"?>
<soap:Envelope ...>
  <soap:Header>...</soap:Header>
  <soap:Body>
    <PerformResponseMsg xmlns="http://exacttarget.com/wsdl/partnerAPI">
      <Results>
        <Result>
          <StatusCode>Error</StatusCode>
          <StatusMessage>The following email validation errors need addressed before the email can be sent.
            %%Member_Addr%%
            %%Member_Busname%%
            %%Member_City%%
            %%Member_PostalCode%%
            %%Member_State%%
          </StatusMessage>
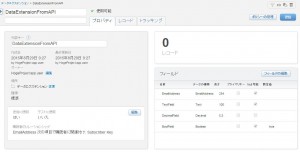
実際に作られるData Extensionはこんな感じ。購読者>データエクステンションで確認できます。
格納されるレコードはこんな感じ。
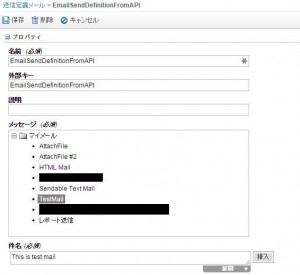
送信定義メールはこんな感じ。インタラクション>送信定義メールで確認できます。
トラッキング>送信から送信ログを確認できます。
こんな感じで開封管理、不達管理やリンクのクリック状況等を確認できます。
