今回はiOSアプリに対してExactTargetのPush通知機能を実装してみます。
参考URL
Androidの実装に関しては過去記事を参照してください↓Push通知用の証明書とProvisioning Profileの取得
通常のiOSアプリのPush通知の設定と同じく、証明書とProvisoning Profileを取得します。全体的な流れはこんな感じ↓
AppID作成 →キーチェーンアクセスでCSR発行して対象のAppIDにアップロード →証明書ダウンロード&インストール →エクスポートした証明書をAppCenterにアップロード →ProvisioningProfileでアプリをビルド
詳細は以下を参照。
Journey Builderの方のリファレンスには証明書しか書いてませんが、Provisoning Profileも必要なので注意してください。App Centerのアプリケーション設定
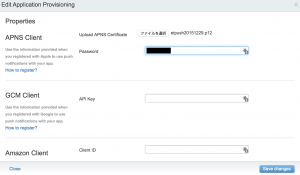
Androidの回と同様、App Centerでアプリケーションを設定します。以下の設定画面で、取得してp12形式で書き出した証明書と書き出すときに設定したパスワードを入力すればOKです。設定後はApplicationIDとAccessTokenをメモります。
アプリの作成
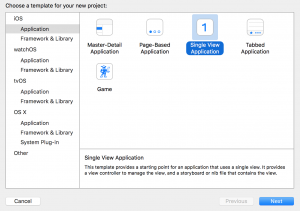
今回はPush通知受け取るだけのシンプルなアプリを作成します。Single View Aplicationを選択
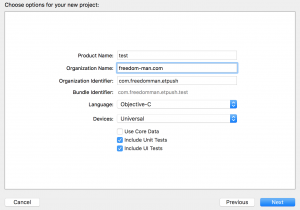
アプリケーションの基本情報を適当に設定
Enable BitcodeがYesになっていることを確認します。
プロビジョニングプロファイルをセットします。
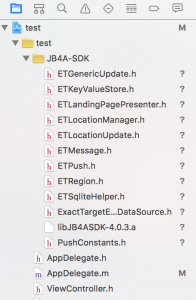
githubのコードからダウンロードして「JB4A-SDK」のフォルダごとドラッグアンドドロップでプロジェクトにインポートします。こんな感じ↓
AppDelegate.mを以下のように修正します。kETAppID_***、kETAccessToken_***などはAppCenterで作成したApplicationID、AccessTokenをセットしてください。
#import "AppDelegate.h"
#import "ETPush.h"

// Code@ AppIDs and Access Tokens for the debug and production versions of your app
// These values should be stored securely by your application or retrieved from a remote server
static NSString *kETAppID_Debug       = @"change_this_to_your_debug_appId";
static NSString *kETAccessToken_Debug = @"change_this_to_your_debug_accessToken";
static NSString *kETAppID_Prod        = @"change_this_to_your_production_appId";
static NSString *kETAccessToken_Prod  = @"change_this_to_your_production_accessToken";

@implementation AppDelegate

- (BOOL)application:(UIApplication *)application didFinishLaunchingWithOptions:(NSDictionary *)launchOptions {
    BOOL successful = NO;
    NSError *error = nil;
#ifdef DEBUG
    // Set to YES to enable logging while debugging
    [ETPush setETLoggerToRequiredState:YES];

    // configure and set initial settings of the JB4ASDK
    successful = [[ETPush pushManager] configureSDKWithAppID:kETAppID_Debug
                                              andAccessToken:kETAccessToken_Debug
                                               withAnalytics:YES
                                         andLocationServices:YES
                                               andCloudPages:YES
                                             withPIAnalytics:YES
                                                       error:&error];
#else
    // configure and set initial settings of the JB4ASDK
    successful = [[ETPush pushManager] configureSDKWithAppID:kETAppID_Prod
                                              andAccessToken:kETAccessToken_Prod
                                               withAnalytics:YES
                                         andLocationServices:YES
                                               andCloudPages:YES
                                             withPIAnalytics:YES
                                                       error:&error];
#endif
    //
    // if configureSDKWithAppID returns NO, check the error object for detailed failure info. See PushConstants.h for codes.
    // the features of the JB4ASDK will NOT be useable unless configureSDKWithAppID returns YES.
    //
    if (!successful) {
        dispatch_async(dispatch_get_main_queue(), ^{
            // something failed in the configureSDKWithAppID call - show what the error is
            [[[UIAlertView alloc] initWithTitle:NSLocalizedString(@"Failed configureSDKWithAppID!", @"Failed configureSDKWithAppID!")
                                        message:[error localizedDescription]
                                       delegate:nil
                              cancelButtonTitle:NSLocalizedString(@"OK", @"OK")
                              otherButtonTitles:nil] show];
        });
    }
    else {
        // register for push notifications - enable all notification types, no categories
        UIUserNotificationSettings *settings = [UIUserNotificationSettings settingsForTypes:
                                                UIUserNotificationTypeBadge |
                                                UIUserNotificationTypeSound |
                                                UIUserNotificationTypeAlert
                                                                                 categories:nil];

        [[ETPush pushManager] registerUserNotificationSettings:settings];
        [[ETPush pushManager] registerForRemoteNotifications];

        // inform the JB4ASDK of the launch options - possibly UIApplicationLaunchOptionsRemoteNotificationKey or UIApplicationLaunchOptionsLocalNotificationKey
        [[ETPush pushManager] applicationLaunchedWithOptions:launchOptions];
    }

    return YES;
}

- (void)application:(UIApplication *)application didRegisterUserNotificationSettings:(UIUserNotificationSettings *)notificationSettings
{
    // inform the JB4ASDK of the notification settings requested
    [[ETPush pushManager] didRegisterUserNotificationSettings:notificationSettings];
}

- (void)application:(UIApplication *)application didRegisterForRemoteNotificationsWithDeviceToken:(NSData *)deviceToken
{
    // inform the JB4ASDK of the device token
    [[ETPush pushManager] registerDeviceToken:deviceToken];
}

-(void)application:(UIApplication *)application didFailToRegisterForRemoteNotificationsWithError:(NSError *)error
{
    // inform the JB4ASDK that the device failed to register and did not receive a device token
    [[ETPush pushManager] applicationDidFailToRegisterForRemoteNotificationsWithError:error];
}


-(void)application:(UIApplication *)application didReceiveLocalNotification:(UILocalNotification *)notification
{
    // inform the JB4ASDK that the device received a local notification
    [[ETPush pushManager] handleLocalNotification:notification];
}

- (void)application:(UIApplication *)application didReceiveRemoteNotification:(NSDictionary *)userInfo fetchCompletionHandler:(void (^)(UIBackgroundFetchResult result))handler {

    // inform the JB4ASDK that the device received a remote notification
    [[ETPush pushManager] handleNotification:userInfo forApplicationState:application.applicationState];

    // is it a silent push?
    if (userInfo[@"aps"][@"content-available"]) {
        // received a silent remote notification...

        // indicate a silent push
        [[UIApplication sharedApplication] setApplicationIconBadgeNumber:1];
    }
    else {
        // received a remote notification...

        // clear the badge
        [[ETPush pushManager] resetBadgeCount];
    }

    handler(UIBackgroundFetchResultNoData);
}

@end
アプリを起動させてみる
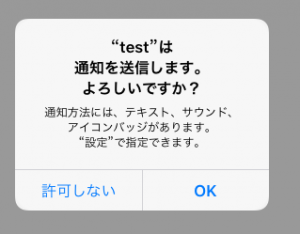
起動すると、通知の許可設定ダイアログが出てくるので、OKをクリックします。これでデバイスがExactTargetに登録されるので、管理画面を使ってPush通知配信したり、デバイストークンやSubscriberKeyによるAPIを利用したPush通知を行うことが出来ます。APIでのPush通知の方法に関してはこちらの記事を参照。
その他のSDKの処理について
SubscriberKeyの取得、登録[[ETPush pushManager] getSubscriberKey];
[[ETPush pushManager] setSubscriberKey:@"input your subscriber key"];
ちなみに取得の方はExactTargetのサーバから取得するのではなくローカルの値を見に行っています。つまり、setSubscriberKeyで設定した値を取得するので、初期値(おそらくGUID)のSubscriberKeyを取得することは出来ないっぽいです。
属性の登録
[[ETPush pushManager] addAttributeNamed:@"hoge" value:@"fuga"];
[[ETPush pushManager] updateET];
updateETをすることを忘れずに(画面遷移があるとSDK内に組み込まれているupdateETメソッドが呼ばれるみたいですが、念のため属性登録をする場所にはupdateETを入れたほうが無難)
デバイストークンの取得
[[ETPush pushManager] deviceToken];
